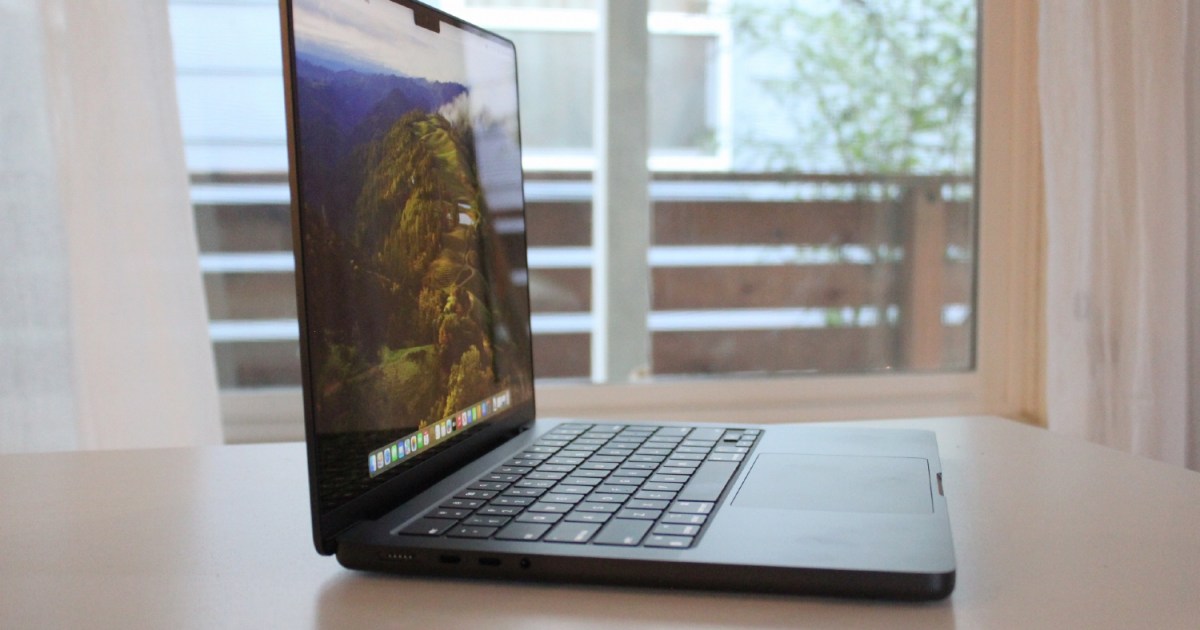
We all know we should back up our computers in case something goes wrong, but many people are put off by what seems like a complicated process. Luckily, it’s very easy to back up your Mac, and there are plenty of options open to you, meaning you can find one that suits you best.
One of the easiest ways to back up your Mac is to use Time Machine, which is a free backup app that’s included with your Mac. Once you’ve set it up, it will automatically do hourly backups for the last 24 hours, daily backups for the previous month, and weekly backups for all past months. You can browse through these backups and restore them easily if you want to. All you need to do is grab an external drive with plenty of space and ensure it’s always connected to your Mac.
In this guide, we’ll cover a few different ways to back up your Mac, from Time Machine to iCloud and third-party services. By the end, you should have everything you need to keep your files safe from disaster.
Alex Blake / Digital Trends
Check your backup drive is ready
Not every disk will be ready to back up your Mac right out of the box, and you might need to format it so that it can be read by macOS. As well as that, if there are already files on the drive, it’s a good idea to erase it so that there’s enough space for your backups (make sure to move your files off it to a safe location beforehand). While a disk can work as both a backup drive and a space for regular file storage, we recommend dedicating the drive entirely to backups to reduce complications and give you more backup space.
Apple recommends using an external disk that has at least double the storage of your Mac. For instance, if your Mac has a 1TB SSD, you should use an external drive that has at least 2TB of storage space. Now, let’s start preparing the drive for your backups.
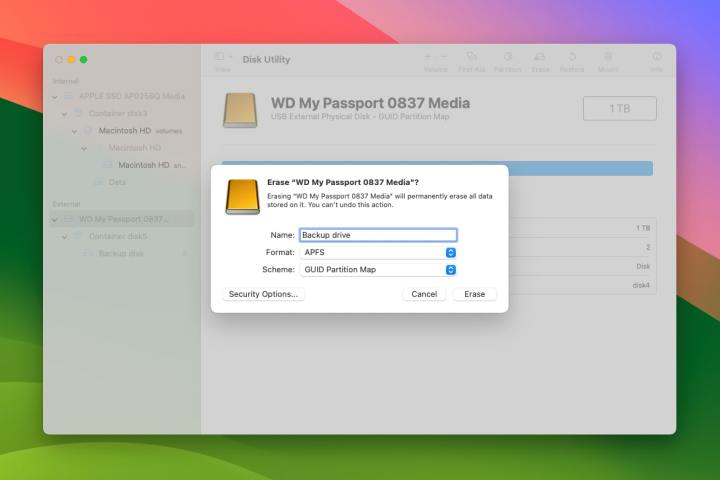
Step 1: If your backup drive is not formatted for macOS, you might see a warning window appear when you plug it in saying “The disk you attached was not readable by this computer.” If so, select the Initialize button. This opens the Disk Utility app.
Step 2: In Disk Utility’s menu bar, select View > Show All Devices. In the left-hand sidebar you should see the name of your external drive (underneath the External header). Select the drive, then choose the Erase button at the top of Disk Utility. Give your disk a name, ensure the format is APFS or APFS (Encrypted) and the Scheme is set to GUID Partition Map, then pick Erase. Once the process has finished, select Done.
Alex Blake / Digital Trends
Set up Time Machine
Now that your external disk is connected to your Mac and properly formatted, it’s time to set up Time Machine.
Step 1: Open the System Settings app from your Dock or by selecting the Apple logo in the top-left corner of your Mac and picking System Settings.
Step 2: In System Settings, go to General > Time Machine. Select the Add Backup Disk button, or press the + button if you already have a backup destination listed and want to add a new one.
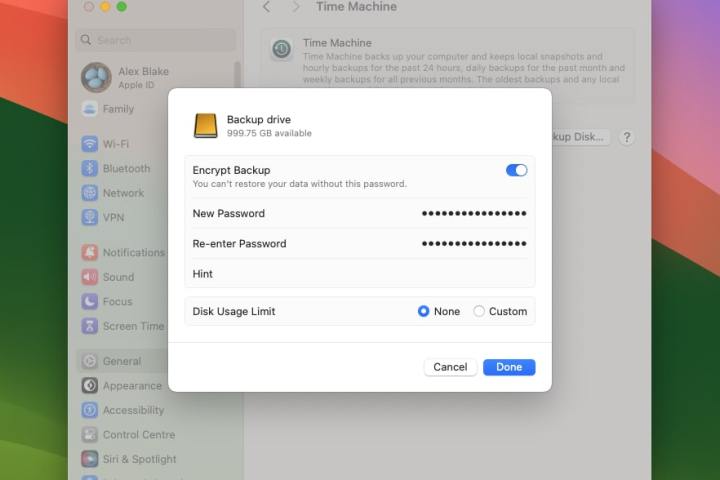
Step 3: You should now see your external disk listed. Select it and choose Set Up Disk. If you want to encrypt your disk, enable the toggle next to Encrypt Backup. You’ll need to enter an encryption password and a password hint. You can also limit how much disk space is allocated to backups by selecting Custom next to Disk Usage Limit and dragging the slider to set a cap. For now, though, select None instead. When you’re done, choose Done.
Alex Blake / Digital Trends
Start backing up to Time Machine
After you’ve set up Time Machine, it will start backing up your files automatically by default. However, you can get more control over the frequency and duration of backups by changing a few settings.
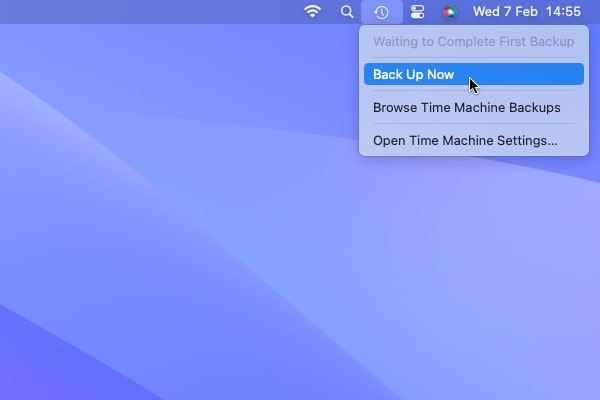
Step 1: Your Mac might add a Time Machine icon to your computer’s menu bar. To start backing up manually, select this icon and pick Back Up Now.
Step 2: If you don’t see the Time Machine icon in your menu bar, open System Settings and navigate to Control Center in the left-hand sidebar. Scroll to the bottom of the pane until you see the Menu Bar Only header. Next to Time Machine, select Show in Menu Bar.
Step 3: If a backup is in progress, you can skip it by selecting Skip This Backup in the Time Machine menu bar app. The top of the menu item shows either your backup progress as a percentage, or when the last backup was completed (depending on whether a backup is currently in progress or not).
Step 4: To change the backup frequency, select the Time Machine menu bar app, then choose Open Time Machine Settings. From here, pick Options, then choose a backup frequency.
Alex Blake / Digital Trends
Restore your entire Mac from a Time Machine snapshot
Restoring files from Time Machine is a straightforward process, and you can restore either your entire Mac or just a few files. Here, we’ll cover the first scenario.
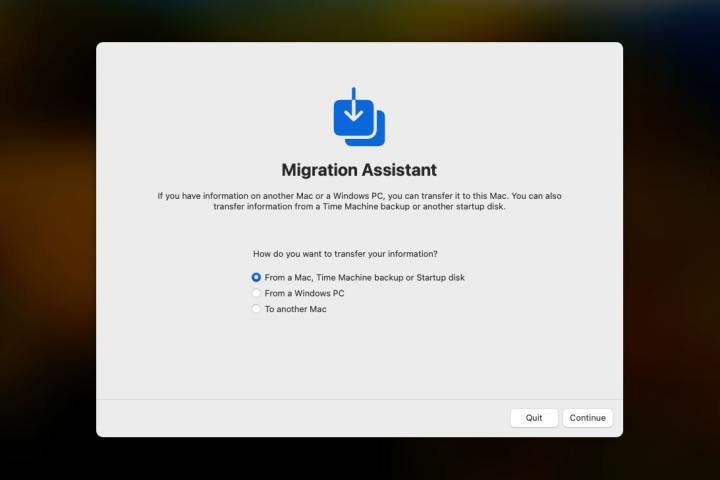
Step 1: To restore everything on your Mac from a previous backup, first open the Migration Assistant app. You can do this by opening the Finder app and selecting Go > Utilities from the Mac menu bar, then opening Migration Assistant from the Utilities folder.
Step 2: In Migration Assistant, select the From a Mac, Time Machine backup or Startup disk option, then pick Continue. Now choose your Time Machine backup disk and choose Continue again, then select the specific backup you want to restore. Choose Continue.
Step 3: You’ll now be asked to decide what you want to restore, such as your apps, user data, files and folders, and settings. Tick the checkbox next to anything you want to restore, then choose Continue. The restoration process will now begin. This could take a few hours, so ensure your Mac is plugged in to power, then let it get to work.
Alex Blake / Digital Trends
Restore a few files from a Time Machine backup
Restoring everything on your Mac from a Time Machine snapshot can take a long time and might be unnecessary if you just need a few files. Luckily, macOS lets you restore specific files using Time Machine.
Step 1: Open the folder whose files you want to restore. For example, if you want to bring back deleted files from your Documents folder, open the Documents folder in the Finder app.
Step 2: Open the Time Machine app by pressing Command+Space and typing Time Machine, or by opening the Launchpad app and finding Time Machine in the Other folder.
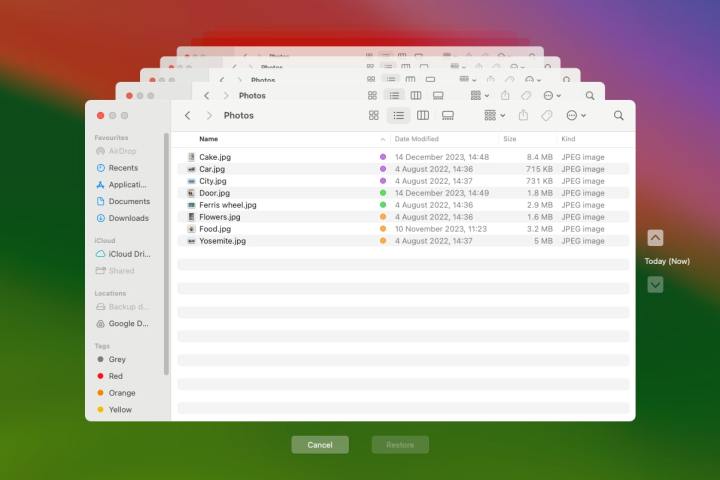
Step 3: All of your other apps will fade out and you’ll just see your Finder window in the center of your screen. If Time Machine has backed up previous versions of this folder, you will see them nestled in a stack behind your front-most window.
Step 4: To the right of the Finder window, you’ll see an up arrow and a down arrow. Select these to navigate backwards or forwards through your backups. Alternatively, you can use the handles in the bottom-right corner of your Mac’s screen.
Step 5: Select any files you want to bring back, then choose the Restore button. Files will be restored to the folder they were originally in. For instance, if a file was in the Downloads folder when a backup was made, it will be returned to the Downloads folder.
Step 6: There’s another way to restore individual files, as some apps make backups of your files using Time Machine. Open the file, then pick File > Revert To > Browse All Versions from the menu bar. You’ll see a similar Time Machine screen to the one described in step 3 above. Select Restore on the version you want to bring back or hold the Option key and pick Restore a Copy. Note that this revert feature doesn’t work for all apps — lots of Apple apps come with this feature, but it’s not guaranteed to work with third-party apps.
Alex Blake / Digital Trends
Sync your files to iCloud
Apple’s iCloud service can back up certain files for you automatically. It’s not a complete solution — it does not provide a total backup of your Mac, so don’t rely on it to save everything — but it can be a good way to keep certain files safe in the cloud.
When your files are stored in iCloud, you can access them from any Apple device (as long as every device is signed in using the same Apple ID). That’s great for keeping things in sync and accessible everywhere you work.
Note that when you delete a file on one device, it’s deleted everywhere. It will be kept in the Recently Deleted folder on iCloud.com or in the Files app on your Mac, but it will only stay there for 30 days. That means iCloud isn’t a proper backup solution in the way that Time Machine is, so you should use it to supplement Time Machine, not replace it.
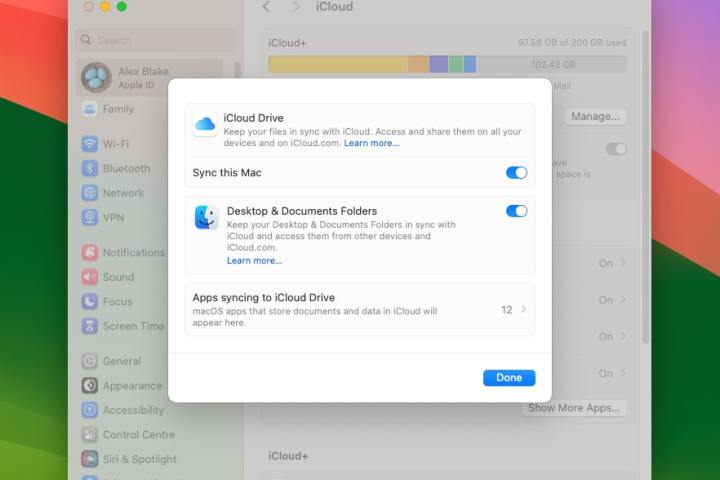
Step 1: Open System Settings and select your name at the top of the left-hand sidebar, then choose iCloud. Under Apps Using iCloud, select iCloud Drive. Now ensure the toggles next to Sync this Mac and Desktop & Documents Folders are enabled, then pick Done.
Step 2: You can also upload your photos to iCloud so that they are available on all your devices. Open the Photos app, then choose Photos > Settings from the menu bar. In settings, select the iCloud tab and tick the checkbox next to iCloud Photos.
Step 3: In this menu, you can choose to either keep original copies of your photos on your Mac (the Download Originals to this Mac option) or save the originals in iCloud and keep lower-resolution versions on your computer (the Optimize Mac Storage option). If you pick the latter, you can download full-resolution versions of your images to your Mac whenever you like by opening the Photos app, going to Photos > Settings > iCloud, then selecting Download Originals to this Mac.
Backblaze
Back up to a third-party service
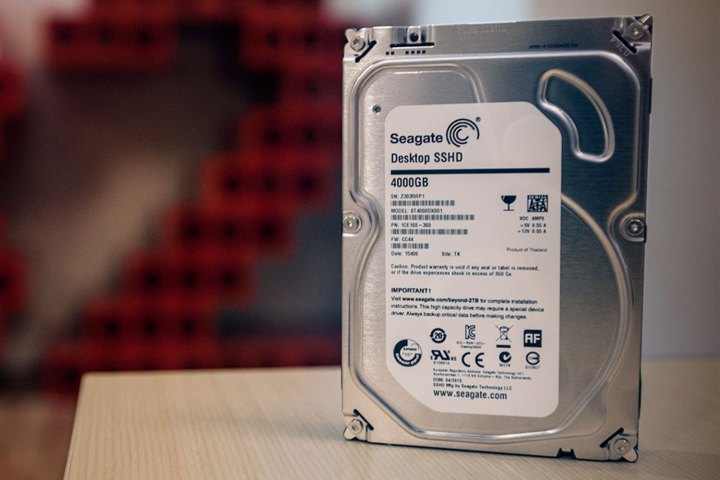
There’s one more option for backing up your Mac: using a third-party service like Backblaze or iDrive. The benefit of these services is that they back up your files to a cloud server, meaning you don’t need to get your own external drive. Given that these companies are in the business of backing up, most will offer you unlimited storage space. That’s handy if you have so much to back up that buying enough external drives would be prohibitively expensive.
Whichever service you choose, you can expect to pay a recurring monthly or annual fee to gain access. Backblaze, for example, charges $9 a month or $99 a year for unlimited storage.
Your initial backup could take a long time depending on how much you need to back up, so it might be an idea to leave your Mac on overnight so it can complete the backup. Once it’s done, though, the service will only back up new files or those that have changed, which will make the process much faster.
As you can see, there are lots of options when it comes to backing up your Mac. The easiest method is to connect an external drive to your Mac and let Time Machine get to work, but you can also supplement that with iCloud syncing, or replace it entirely with a third-party solution. That means you’ve got plenty of choice over how to back up your Mac and keep your files safe.
Editors’ Recommendations

