The iRobot Roomba Combo j9+ is a powerful robot vacuum and mop that’s capable of cleaning all types of floors with no manual input. But like all electronics, it needs regular maintenance to continue working at full capacity. Your docking station will take care of emptying the dustbin and keeping the mopping pad wet, though you’ll periodically want to check its dustbin and filter to ensure they’re not clogged with debris.
Trying to crack open your Roomba combo j9+ and clean its bin and filter? Here’s a step-by-step look at the process.
How to clean the bin and filter on the Roomba Combo j9+
Cleaning the bin and filter on the Roomba Combo j9+ is a simple process. First, you’ll need to remove your robot from its dock. Once it has been carefully extracted, here’s what you’ll need to do.
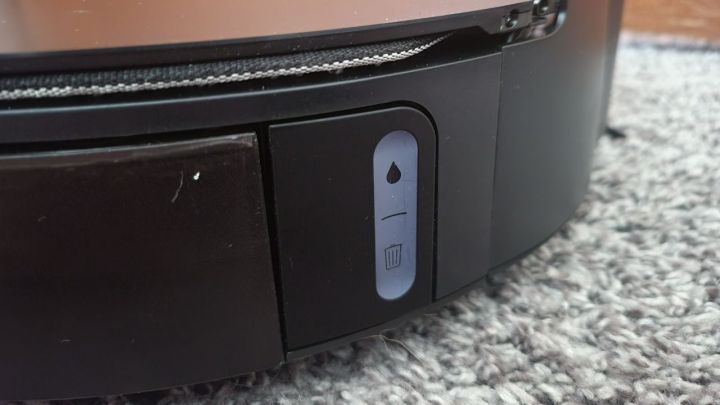
Step 1: Open the bin door by finding and pressing the release button. This is easy to locate — just look for the garbage can icon on its outer hinge. Firmly press this button, and the bin will unlock.

Jon Bitner / Digital Trends
Step 2: Gently remove the bin from the robot.
Step 3: Once the bin has been removed, remove the filter from the bin. The filter is located in a small compartment on the outside of the dustbin.

Jon Bitner / Digital Trends
Step 4: Remove dust from the filter by gently tapping it against the side of your garbage. Do not rinse the filter, as it’s not designed to come into contact with water or other liquids.
Step 5: Open the dustbin by pulling on the green tab. Shake any debris into the garbage.
Step 6: Ensuring the filter is not installed in the dustbin, rinse the bin with warm water.
Step 7: Let the bin dry, then place the filter back into the bin.
Insert the bin back into the robot vacuum. You should hear a click when it’s properly installed.

Jon Bitner / Digital Trends
That’s it! Your Roomba Combo j9+ is now clean and ready to roll. While you’re cleaning out the dustbin and filter, consider looking at its brushes and wheels. It’s not uncommon for objects and debris to get lodged in these locations, and it’s good practice to check them while cleaning the bin.
Editors’ Recommendations

