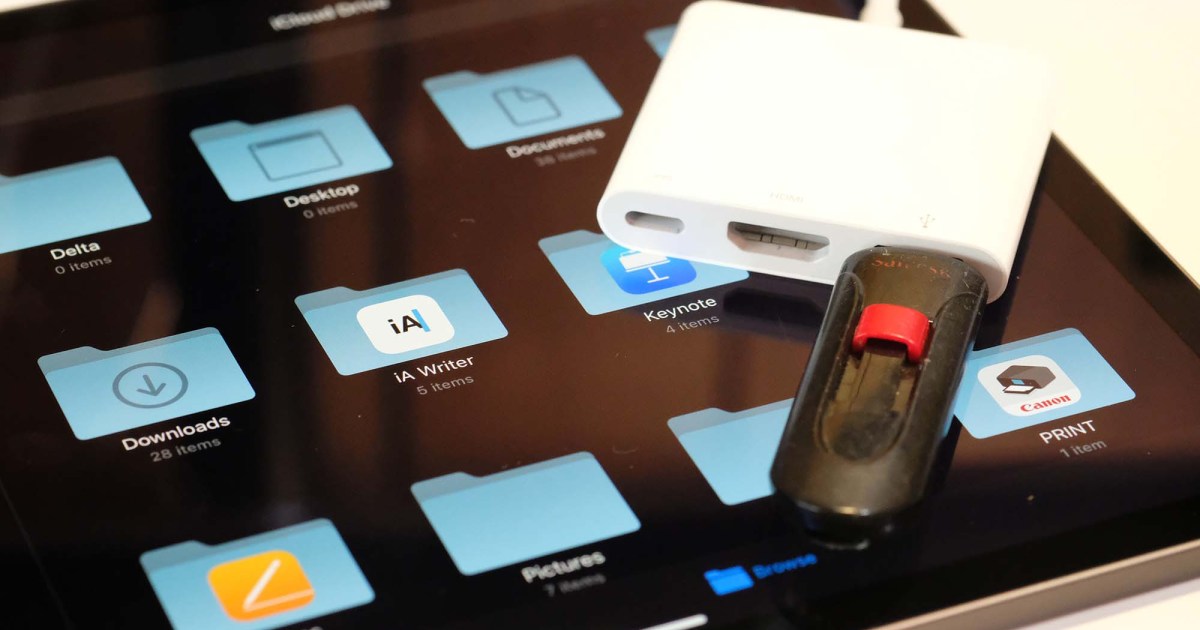
While cloud storage has made things a bit less troublesome, most people will eventually max out the available space on their iPad or iPhone. From games and apps to music and more, there are thousands of files vying for your SSD — and even if you pick up a model with a 1TB SSD, there’s a good chance that years of use will consume every last byte of space you had available.
Thankfully, Apple makes it easy to use external storage with an iPhone or iPad. This is especially true of newer models that feature a USB-C port, though even older models with Lightning ports can still make use of the feature. Here’s a closer look at how this works, along with a few tips and tricks to maximize its potential.
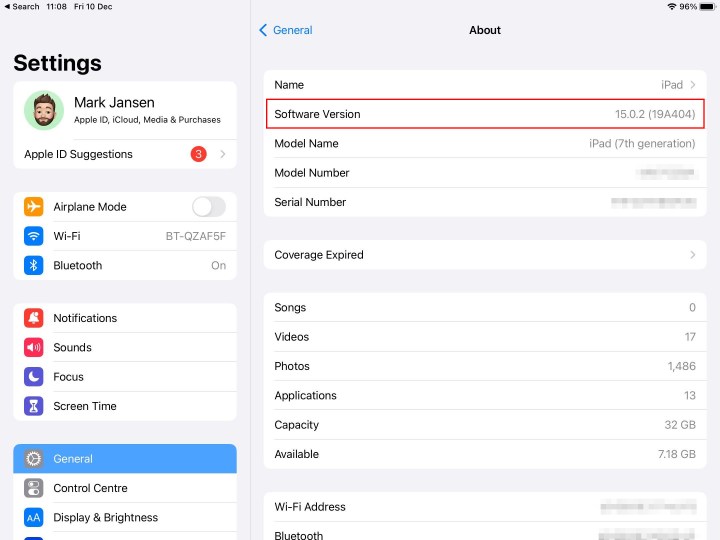
Image used with permission by copyright holder
How to make sure iOS is up-to-date
To gain native compatibility with external storage devices, your iPhone or iPad will need iOS 13 or a later operating system, like iOS 17.
Unsure of the iOS version you’re running? Here’s how to check:
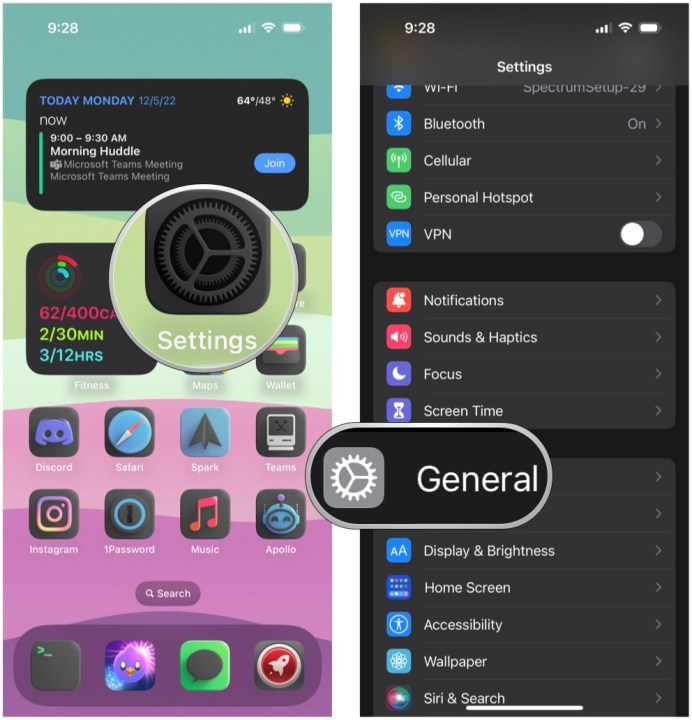
Step 1: Tap to open the Settings app.
Step 2: Scroll down and tap General.
Step 3: Tap About. Check the number next to Software Version. If it’s lower than 13, move on to the next step. If it’s version 13 or higher, move to the next section of this guide.

Christine Romero-Chan / Digital Trends
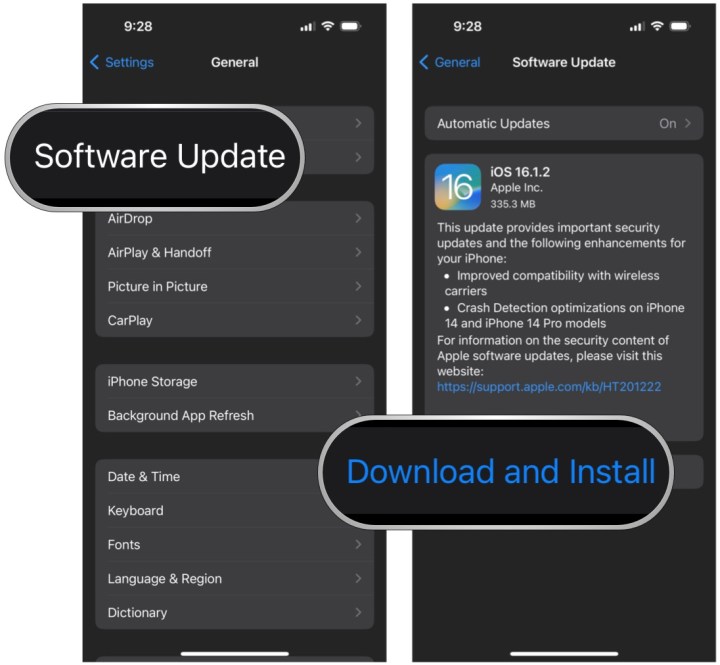
Step 4: Return to the General screen in the Settings app.
Step 5: Tap Software Update.
Christine Romero-Chan / Digital Trends
Step 6: If an update is available, tap Download and Install. If your device is already up-to-date, it will state as such, along with the current version installed.

Image used with permission by copyright holder
Lightning vs. USB-C
Before plugging an external device into your iPhone or iPad, check which connector it’s using. Apple introduced the Lightning port in 2012 as part of the company’s goal to make the iPhone slimmer. It’s smaller than the now more-common USB-C port introduced two years later. While Apple was part of the overall USB-C design process, Lightning and USB-C are separate technologies, so they’re not interchangeable, and you’ll need different cables for both.
Apple’s Lightning port is slimmer than USB-C, perfect for iPhones and iPads. The connector, flatter in design, has exposed pins, whereas a USB-C connector encloses the pins. All new iPads and iPhones are being designed with USB-C, so unless you’re using an older product, you’ll be using USB-C cables to access external storage devices.
How to physically connect your external storage
Before unlocking your iPad or iPhone and jumping into the software, you must establish a physical connection between your external storage device and your tablet or smartphone. If your iPhone or iPad and external device have matching plugs, connect both by plugging them into one another using the bottom connector of your Apple device.
For example, a thumb drive might also use a Lighting connector, allowing it to plug directly into iPhones and most iPads. Or, an external hard drive might use a USB-C connector, allowing it to plug directly into iPad Pro devices. Otherwise, if the connectors are different, you will need to purchase an adapter so that your external device can connect to your iPad or iPhone.
If you have an Apple device with a Lightning connector and need to plug in an external device with either a USB-C or USB-A connector, one option is Apple’s Lighting to USB 3 Camera Adapter. This adapter lets you plug more than just external USB-C and USB-A camera devices into your Apple device.
If you have an Apple device with a USB-C connector, such as the iPad Pro, and need to plug in an external device with a USB-A connector, Apple sells a USB-C to USB adapter.
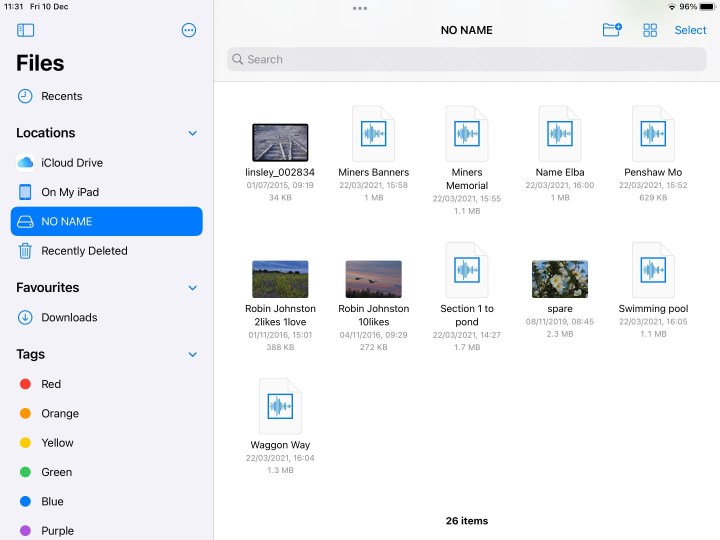
Image used with permission by copyright holder
How to browse files from your external storage
Once your external device is physically connected to your Apple device, you can use the native Files app to access the external device.
Note: To select multiple files or folders, tap the Select option in the upper-right corner, and then tap each file or folder you wish to manipulate.
Step 1: Tap to open the Files app on your iPhone, iPad, or iPod Touch.
Step 2: Under Locations, tap the name of your external drive. In this example, it’s simply labeled Drive. On the iPad, the contents of your external device appear on the right. On the iPhone and the iPod Touch, the contents appear on the following screen.
Step 3: Tap any folder or file with your finger to open it or tap and hold with your finger on any visible folder or file to open a submenu for additional management options, including copying, duplicating, moving, deleting, renaming, tagging, and favoriting.
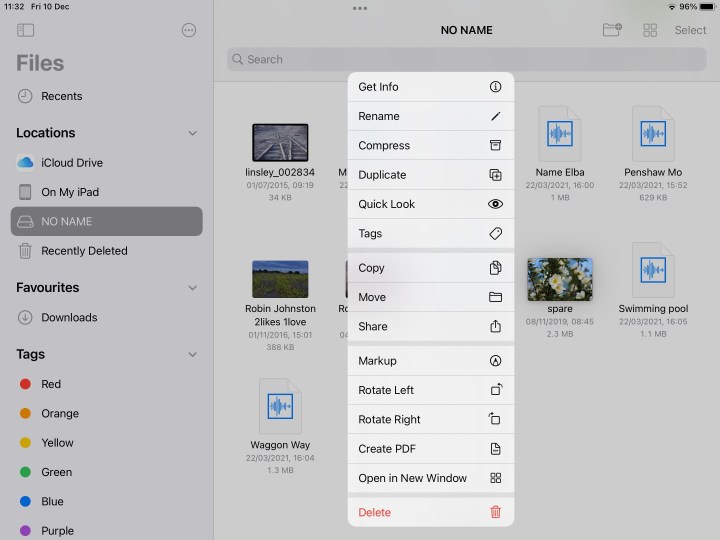
Image used with permission by copyright holder
What if you can’t access your storage device?
If you’re unable to access documents stored on a connected device, try these troubleshooting options.
Check the connection: Double-check that your devices are correctly plugged in with the appropriate plugs and adapters. If you have extra cords and adapters, try using them or plug into different ports if you can.
Check the drive’s file format: Ensure that your external storage device is formatted so that both Mac and iOS devices can read it. Windows assumes the NTFS file format, but that isn’t the case with Mac and iOS. Both platforms support exFAT, but this format only supports files up to 4GB.
Check the power requirements: Sometimes your devices don’t have enough power to support external hard drives. Solid-state drives, hard drives, and some other devices may need more power than your iPhone or iPad can output.
Consult Apple: As a last resort, you can always reach out to Apple directly with any questions you have concerning problems that inhibit your use of external storage. Either consult the Apple Support website or talk to an expert at your local in-store Genius Bar.
As you can see, your iPhone or iPad can access your files on external storage devices, as long as you have the right equipment to do so. With this in mind, your iPhone or iPad can act as a great solution for viewing or editing those files while you’re on-the-go and away from a computer.
Editors’ Recommendations

